
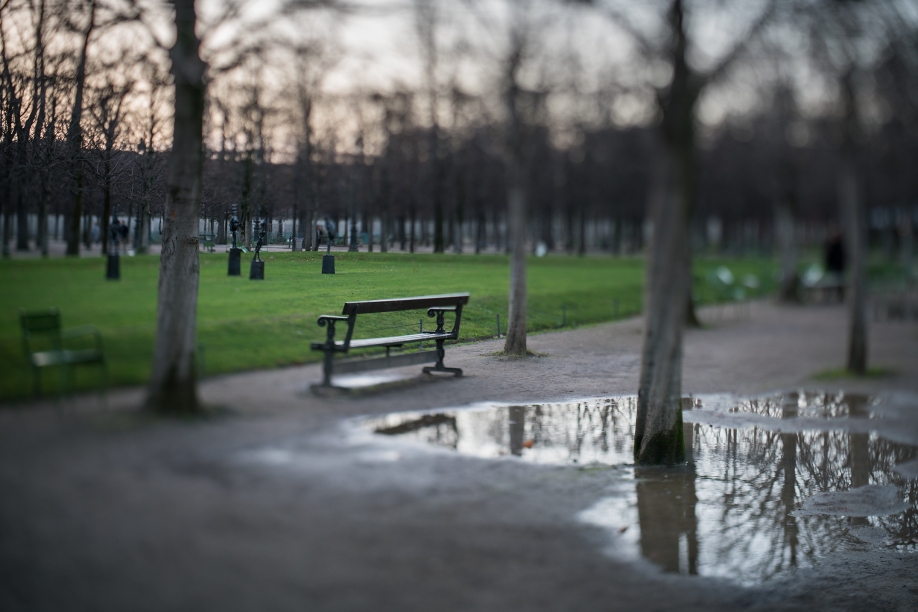
The Tuileries Garden in Paris. Handheld, maximum diagonal tilt, @f1.4.
- Introduction
About a month ago, I was extremely fortunate to test two of the best and most impressive lenses for full frame cameras, together with a new tilt/shift adapter meant to mount manual lenses on a mirrorless system.
Namely, I got to test the HCam Master Tilt Shift adapter together with a couple lenses from the Otus line from Zeiss: the Nikon mount 55mm f/1.4 and the yet to be released Nikon mount 28mm f/1.4.
The main purpose of these lenses is admittedly for high-resolution stills and video, I like to do things differently. This is why I spent a few weeks in France testing them, and I was especially interested in seeing how well they would perform with long exposures, or when they are shifted, tilted, and of course how sharp they are wide open.
- Disclaimer:
The purpose of this article is to share some of the images I shot with these lenses and some of my impressions. I am not sponsored nor have been paid by either ZEISS nor HCam for this test. Additionally, it is not meant to be a formal test with charts, or shooting a wall of bricks at different apertures to look at distortion and such. Its purpose is really to see how the adapter and lenses behave in the field, when used for fine art still photography. Unless mentioned otherwise, the images you will find below have been shot on a Sony a7RII in uncompressed RAW mode, imported in Camera RAW and Photoshop for minimal editing (curves, contrast etc). They have only been edited by applying minor white balance, curves, and contrast tweaks, and nothing more except for a B&W conversion with Silver Efex Pro2 for a few of them. Each image was eventually downsized for web browsing and saved as high-res jpgs files. The behind the scenes images were shot with a Sony RX100 IV.
- The HCam Master TS adapter:
This very solid and precisely machined adapter is German-made. A detail worth mentioning as it sticks to the reputation, and is extremely well built and sturdy. It is meant to mount Canon EF lenses (or other adapters for medium format for that matter) on a Sony E mount mirrorless. Unfortunately, it does not have electronic connections, which means that you can only use fully manual lenses with it (unless you are willing to go through this route). For that reason, I was sent Nikon mount Otus lenses with an extra slim adapter, but I’ll get back to this later.
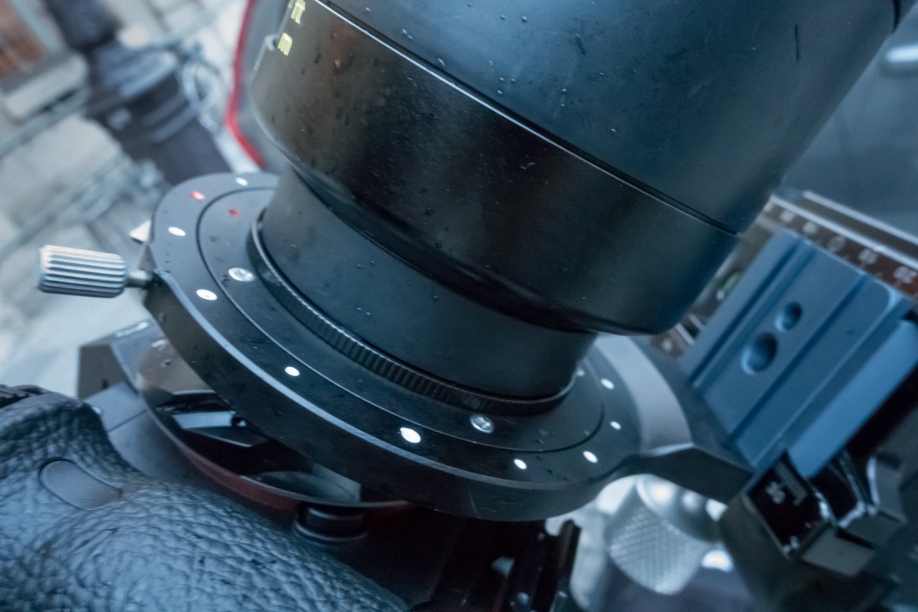
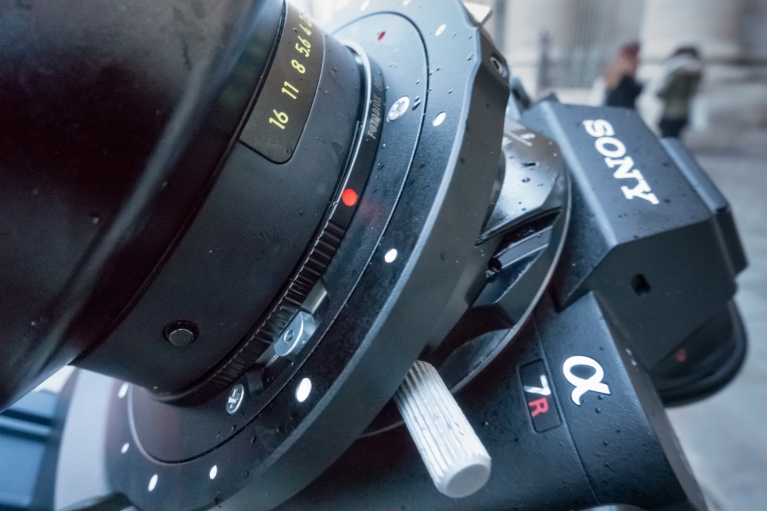
Unlike any other adapter though, the HCam Master TS allows the photographer to tilt and shift the lens with respect to the camera body. It allows for 10° tilt and up to 15mm shift in each direction if the image circle is large enough, which brings and incredible freedom of creation and control for the position of the focal plane and the perspectives, respectively.
Thanks to a very smart and secure system that can be locked in place when needed, it is possible to rotate both the lens and camera independently, and this allows for manipulating the direction in which the lens is shifted and tilted, as well as the orientation of the camera (landscape or portrait). The HCam Master TS system can therefore be used for either architectural, fine art, and/or portrait photography.
The Master TS system is meant to be used on a tripod: the foot can be securely tightened through a couple of screws onto an Arca/Swiss type plate (included in the box), and because both the lens and the camera can be rotated, it is no problem to orient, tilt and shift to the maximum amount the setup. Since the camera/lens setup is mounted on the tripod using the foot, it is good to note that it is the camera that shifts and tilts with respect to the lens, which is opposite and an advantage compared to modern FF T/S lenses. In some occasions during my trip to France however, the use of a tripod was forbidden, which forced me to use the system handheld. In some rare cases I ran into the issue of not being able to tilt all the way because the system would come into contact with the camera. Using the Otus lenses however was nice because I only had to open slightly more the aperture in order to “increase” the amount of blur in camera, so it was not a real issue.
For more details on the adapter, please see the images below:
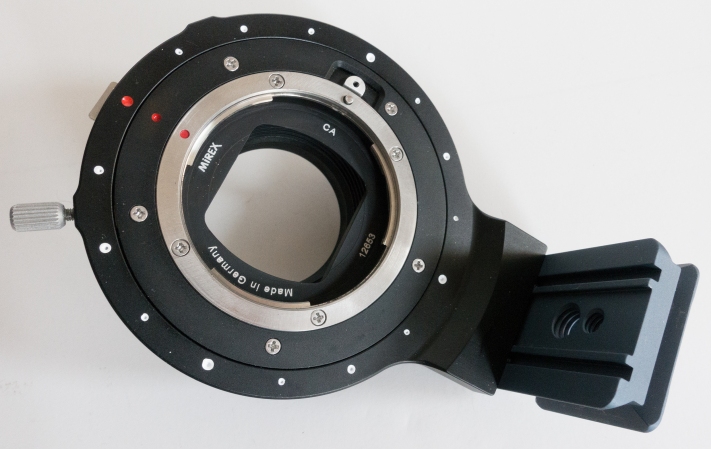
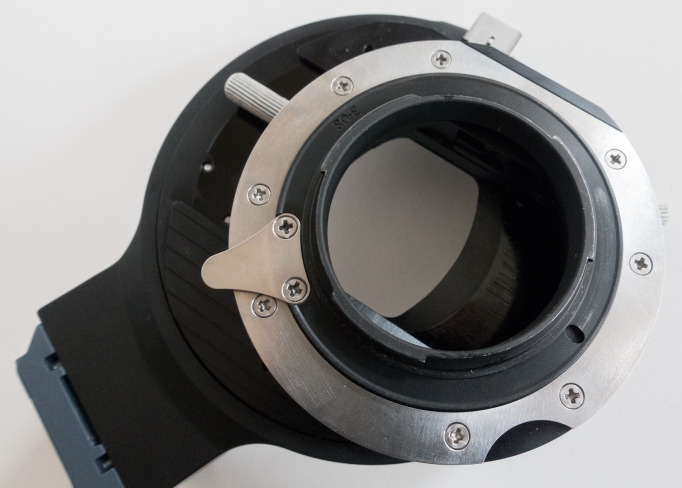
Front view of the adapter mounted on the Arca/Swiss type plate. Canon EF mount (lens) side.
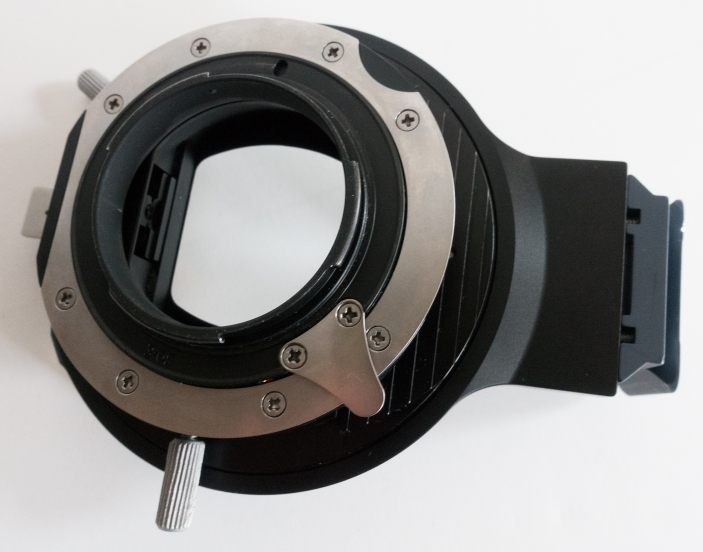
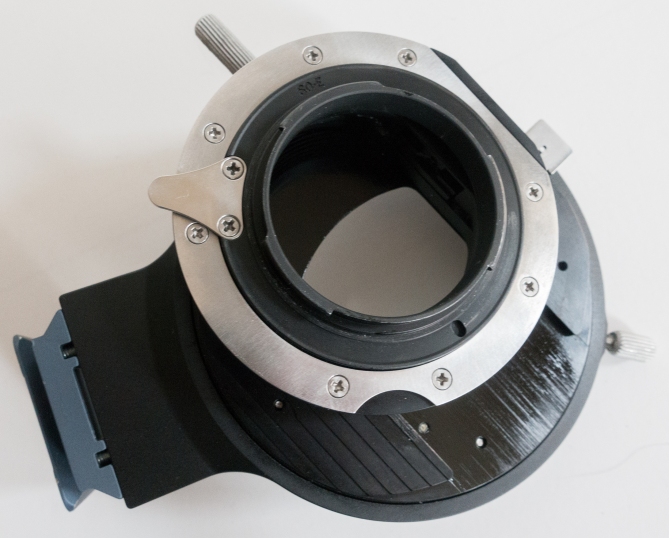
Back view of the adapter mounted on the Arca/Swiss type plate. Sony E mount (camera) side.
Front view of the adapter; Canon EF mount (lens) side, zoomed on the lens release and rotation system (no rotation here).
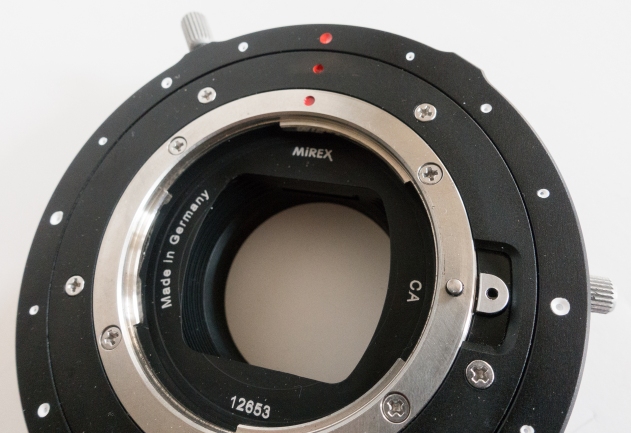
Front view of the adapter; Canon EF mount (lens) side with about 20° rotation of the camera mount.
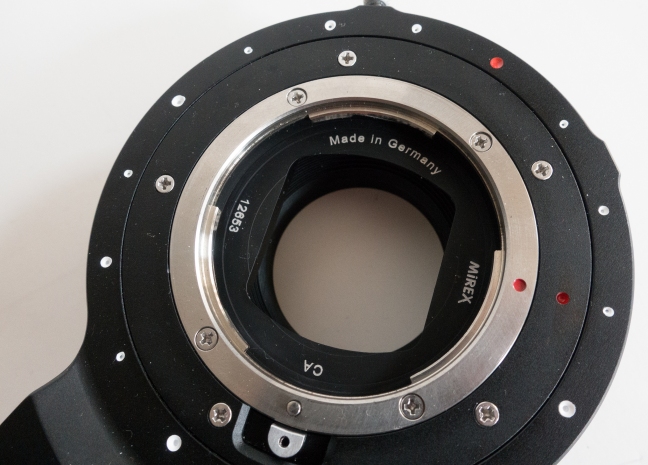
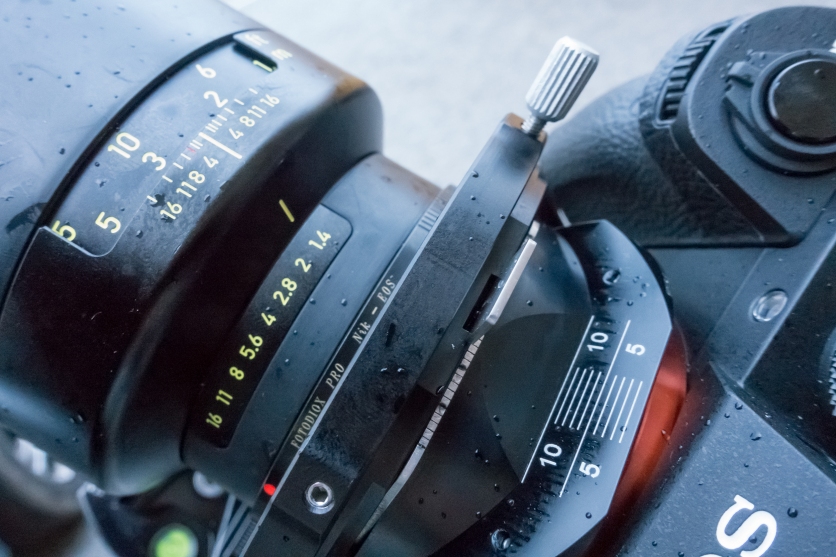
Back view of the adapter; Sony E mount (camera) side with 15mm shift one way or the other and roughly 20° rotation of the camera mount.
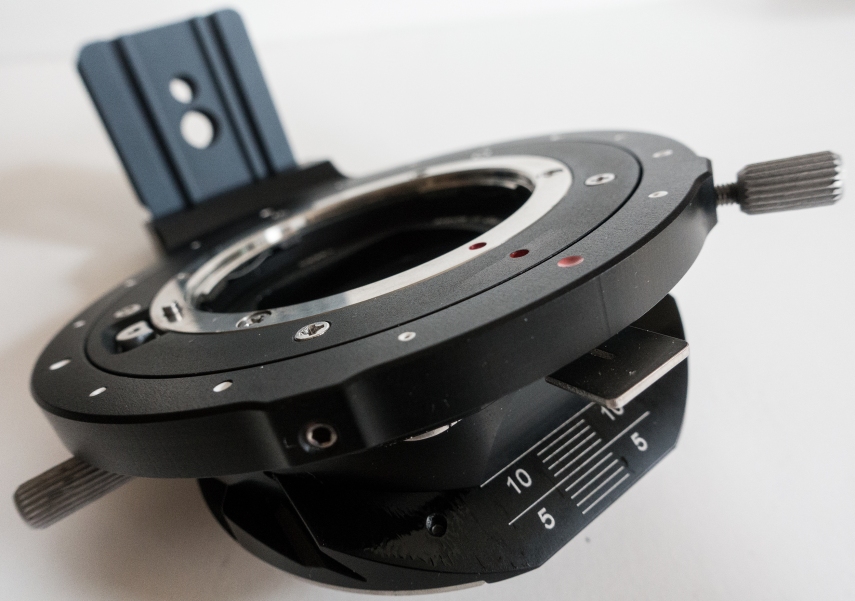
Side view of the adapter with with 10° tilt of the camera mount.
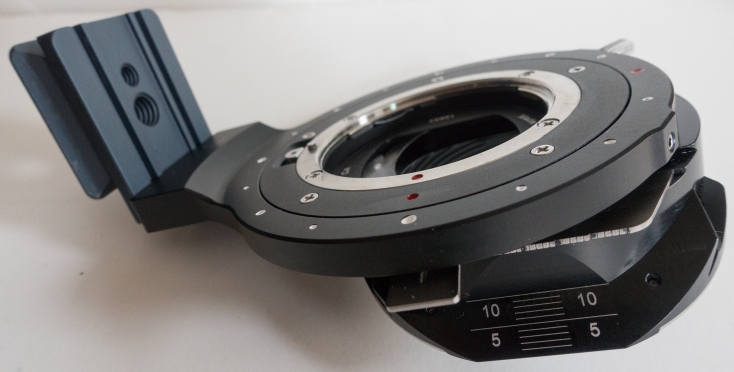
Side view of the adapter with with 10° tilt, 15mm shift, roughly 10° rotation of the camera mount and 45° rotation of the lens mount.
- Nikon F to Canon EF mount adapter:
Because the HCam Master TS has no electronic connection and the Canon versions of the Otus lenses require it, I decided to test the Nikon F mount versions. Which means that I needed a slim, sturdy and secure Nikon F to Canon EF mount adapter in order to mount the lenses on the Master TS and keep infinity focus (the flange distance for Nikon being larger than Canon, one such adapter exists).
After reading a few reviews online, I settled for the FotodioX Pro adapter (without focus confirmation chip), which was well rated and allowed me to remove it in the field from one lens and put it on the other in a matter of seconds, with no need for extra tools.
- Zeiss Otus 55mm f/1.4 & 28mm f/1.4, Nikon mount:
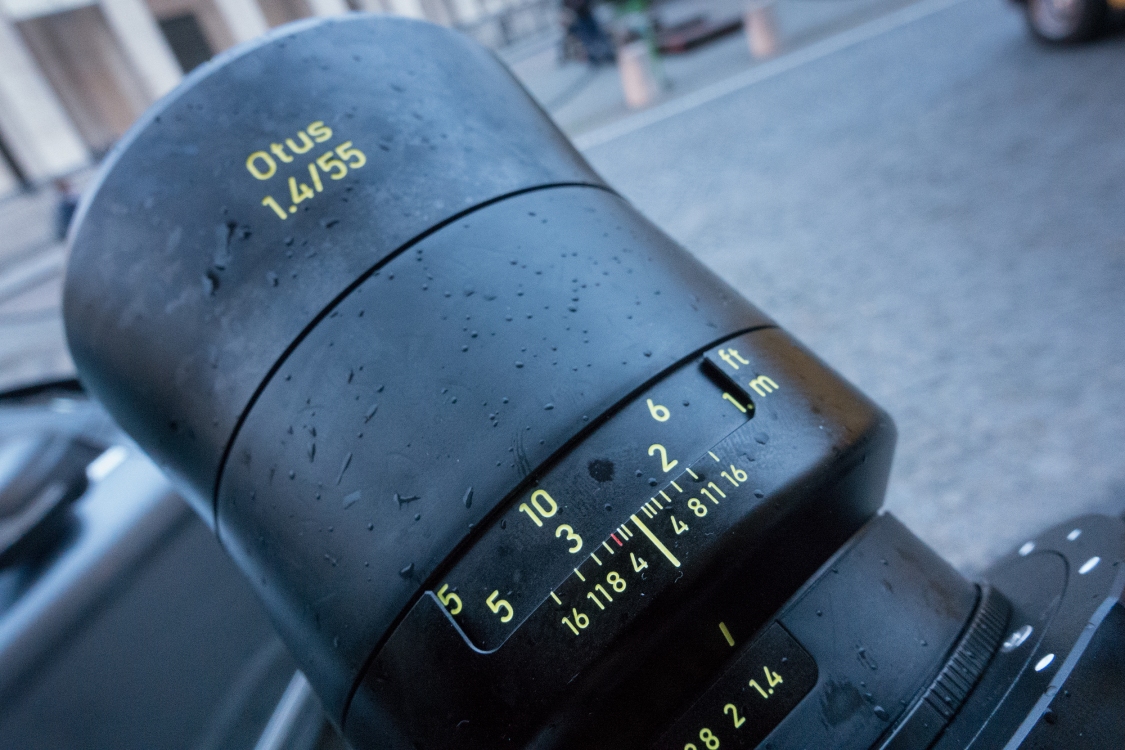
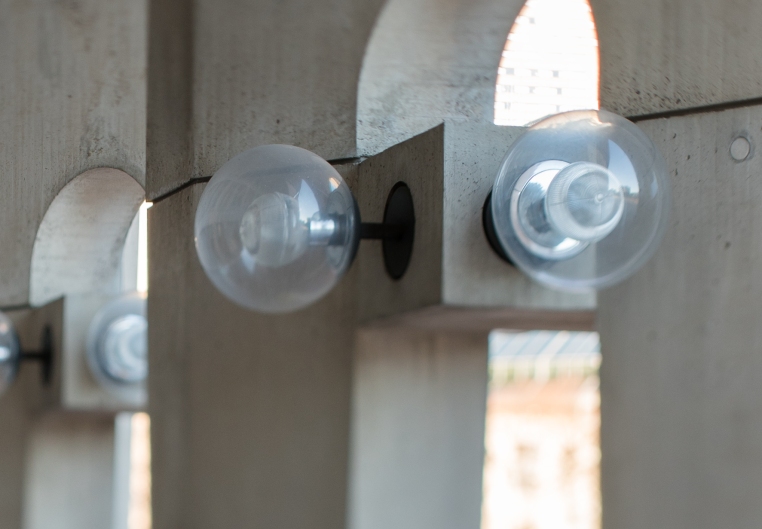
What to say besides these are two exceptional lenses?? They are solid, and they are things of beauty. The front and back lenses are amazing to look at, the focusing ring is smooth, precise and a pleasure to rotate, and the aperture ring (only for the Nikon mount versions) is precise, and lets you choose aperture with a 1/3rd stop precision on small f-stop numbers, and larger steps at smaller apertures (see picture below).
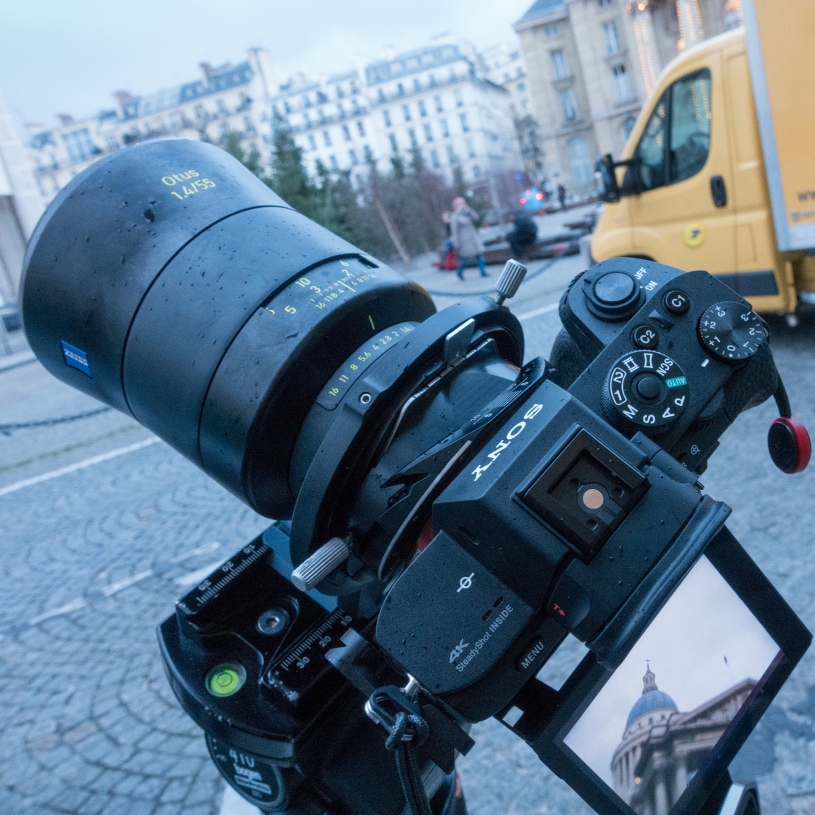
BTS image in Paris at the Pantheon of me shooting with the Sony a7RII, HCam Master TS with 10° tilt and Otus 55mm f/1.4 fully open.
To address the elephant in the room, these lenses are BIG and HEAVY, especially the ZEISS Otus 1.4/28 it is bigger than the (ZEISS Otus 1.4/85). But this is exactly what you want in such fast lenses: a large front element (77mm filter thread for the 55mm, and 95mm diameter for the 28mm!!), huge image circle, especially if like me you want to tilt and shift them.
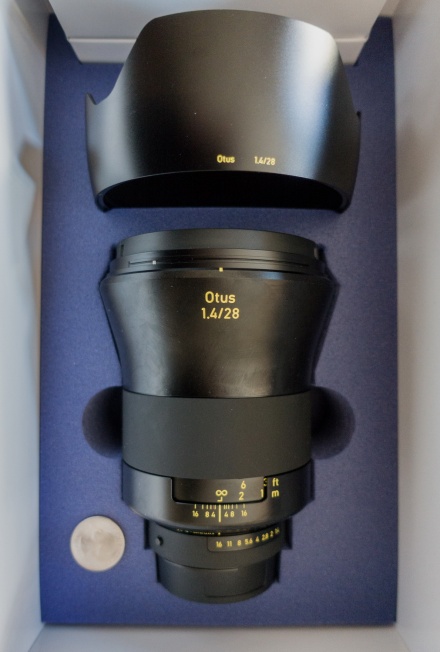
Phone snapshot of the Otus 28mm f/1.4 when I received it, with a quarter coin as a size reference. Please forgive the low quality and keep in mind this is a pre-production lens, and that the box was therefore not the box it will be shipped in.
- BTS images:
- Otus 55mm f/1.4 @1.4 (in Paris, in front of the Pantheon):
My setup for most of my shooting in France: Sony a7RII, HCam Master TS and either the Otus 28mm or the 55mm (here with the 55mm, tilted at 10°)
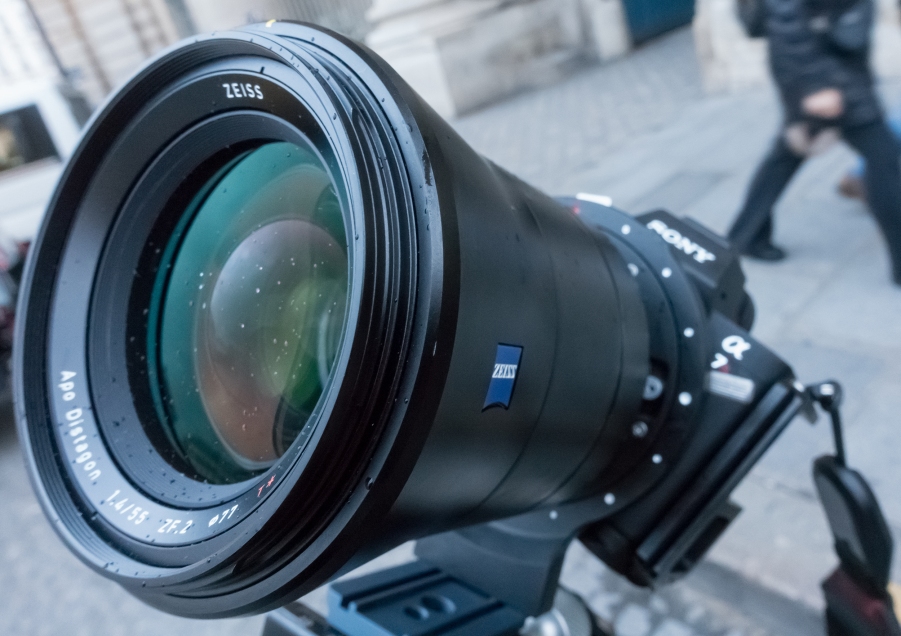
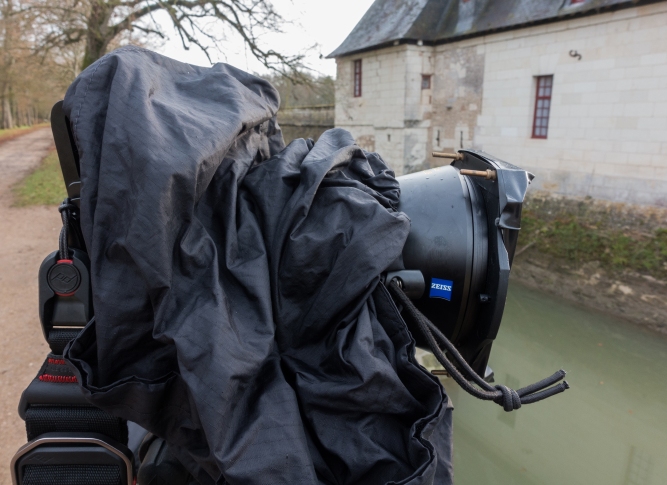
Front element of the 55mm. As you can see, it was rainy, but thanks to such a wide aperture and the added tilt, the rain drops are invisible in the final image (see below).
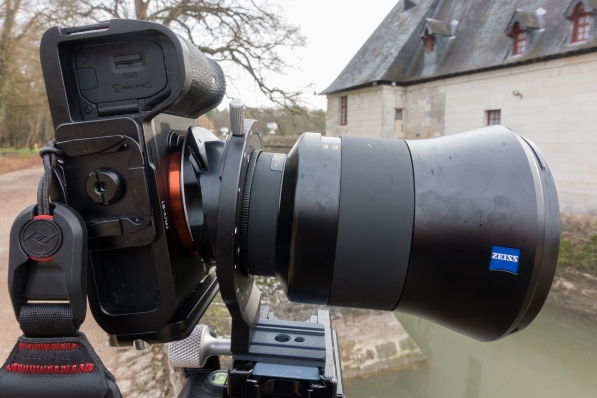
Zoom on the 55mm lens / Nikon F to Canon EF Fotodiox / Master TS adapters. No light leak visible for normal exposures, no problem under slight rain.

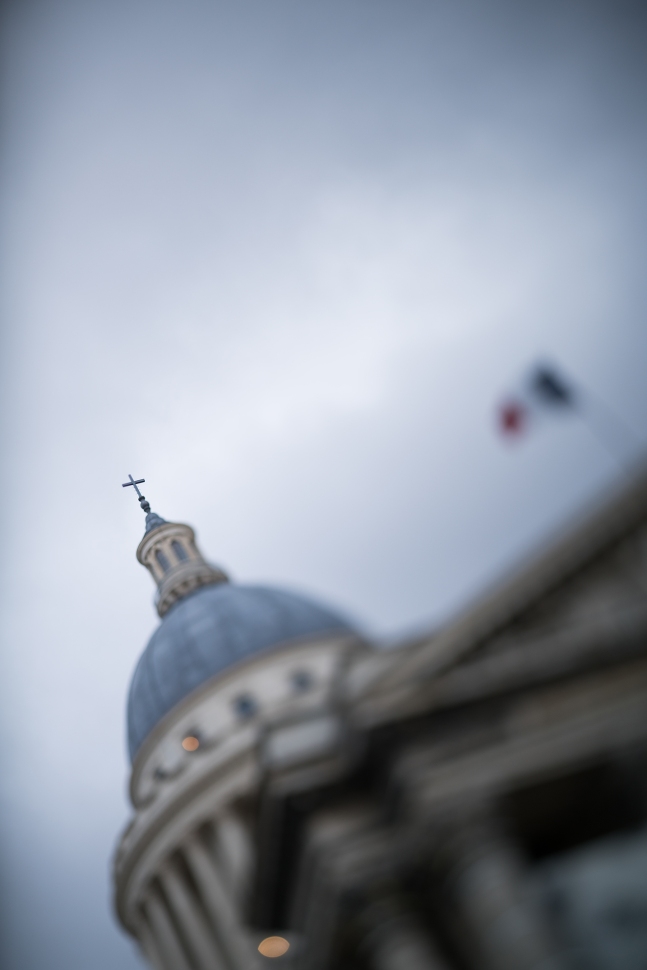
Live view on the back screen of the Sony a7RII. It’s hard to tell here, but only the top of the cross on the Pantheon is sharp. See image further down for confirmation.
Final image after conversion from uncompressed RAW file shot with the Sony a7RII. Only the cross is focused, the lower parts of the image blurring out very nicely. For those interested, we can see two nice out of focus highlights with 9 sides, as expected from the 9-blade aperture. Please not that with a full 10° tilt, no vignetting can be seen.
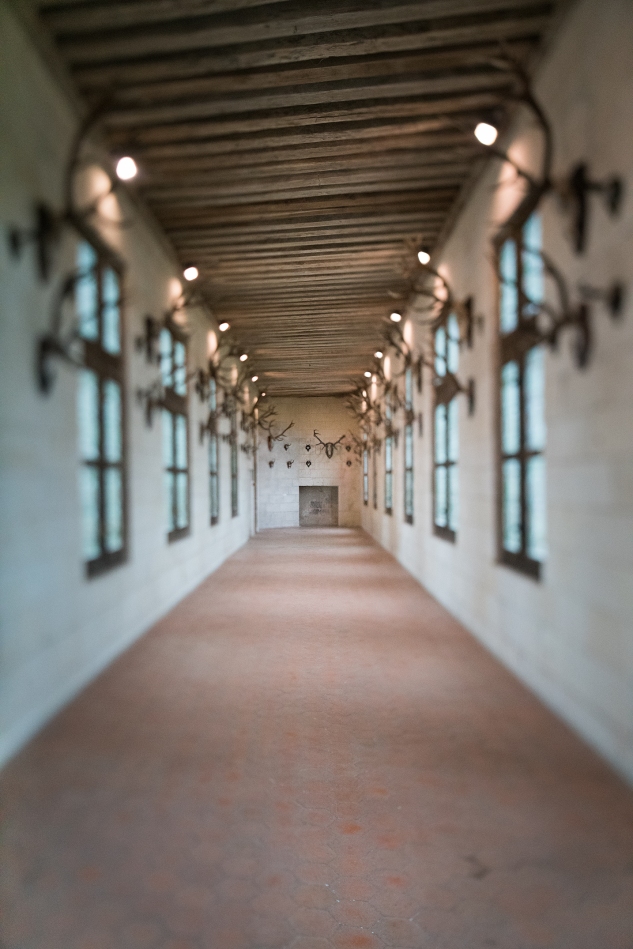
2. Otus 28mm f/1.4 (at one of the most beautiful Loire Valley Chateaus, Chenonceaux) 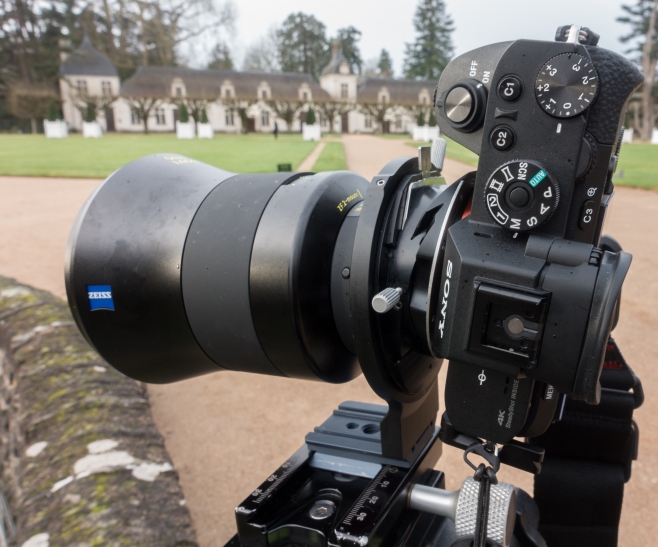

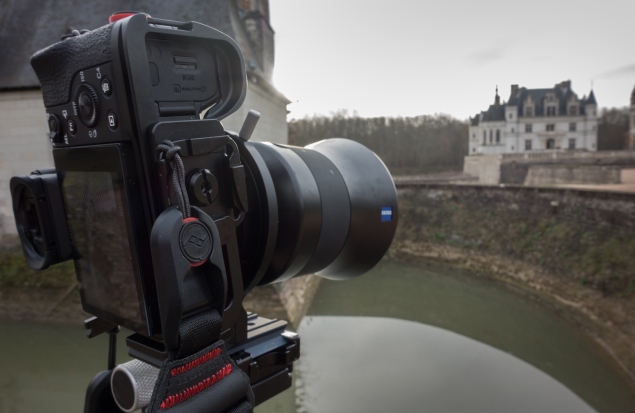
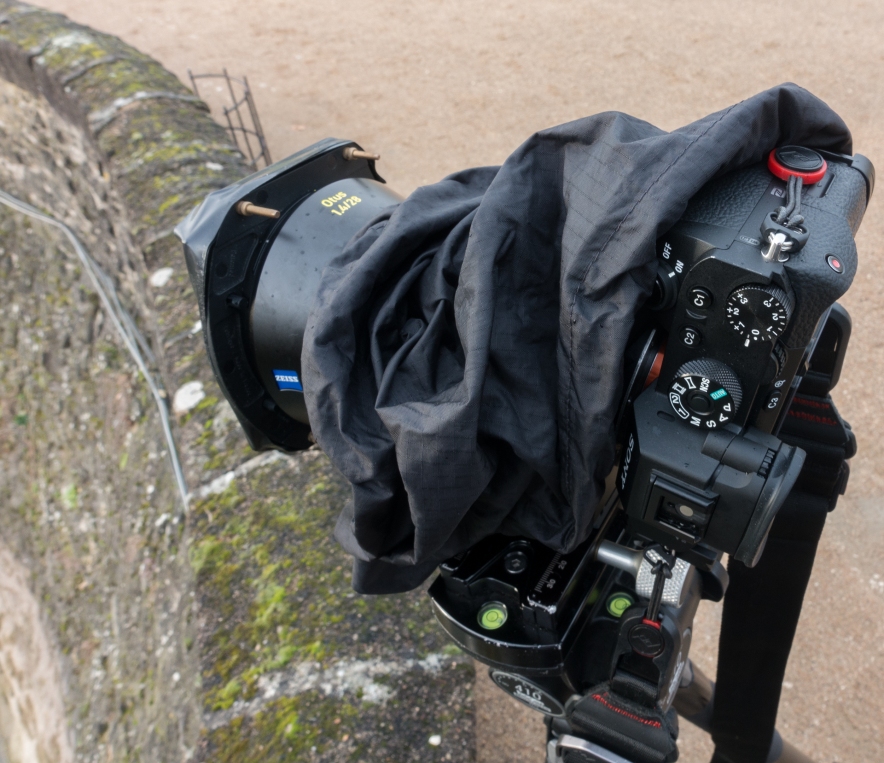
Sony a7RII, HCam Master TS and Otus 28mm (with 10° tilt and camera ~5mm shifted down).
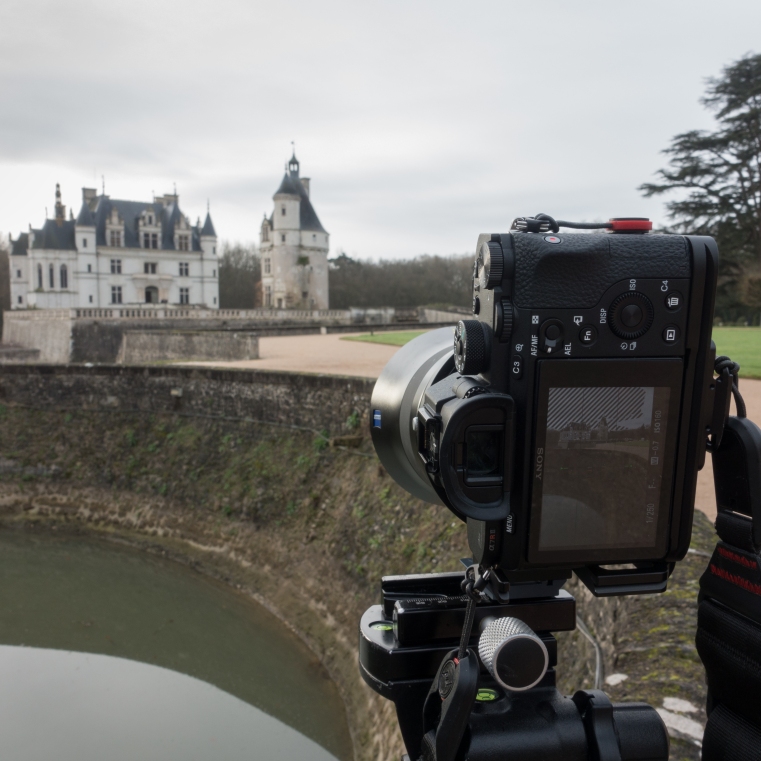
Live view on the back screen of the Sony a7RII. Only the castle is focused.
My setup for long exposure: additional Cokin Z-Pro adapter and holder, Formatt Hitech ND16 Firecrest 100x100mm filter and storm jacket to protect from light rain and any possible light leakage coming from the multiple adapters.
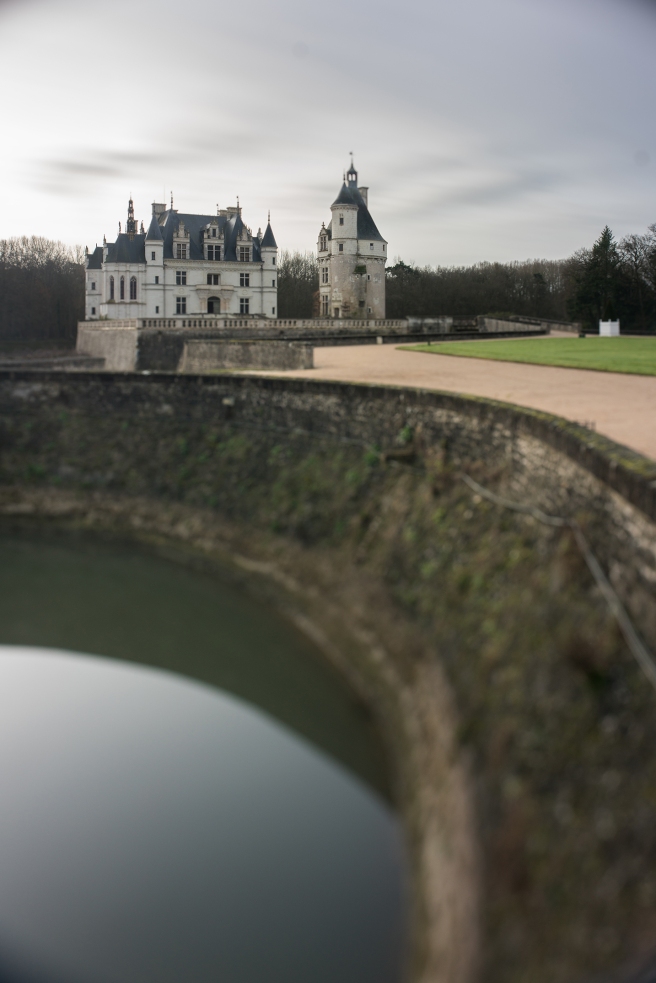
Final image after conversion from uncompressed RAW file shot with the Sony a7RII. No light leakage after ~3 minutes long exposure @f8. The Zeiss Otus 28mm f/1.4 is a great lens for long exposure tilt/shift photography!
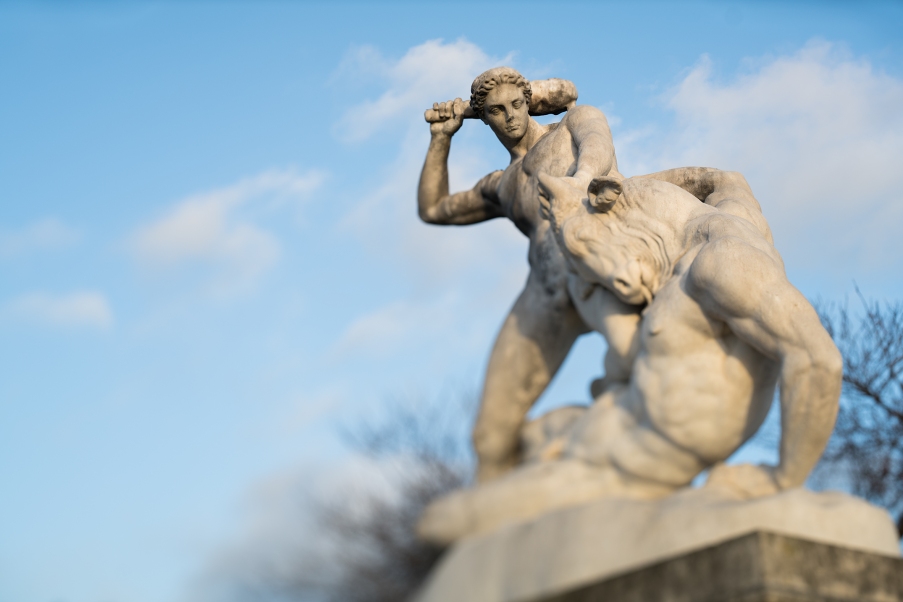
- More images shot with this system:
1. BTS:
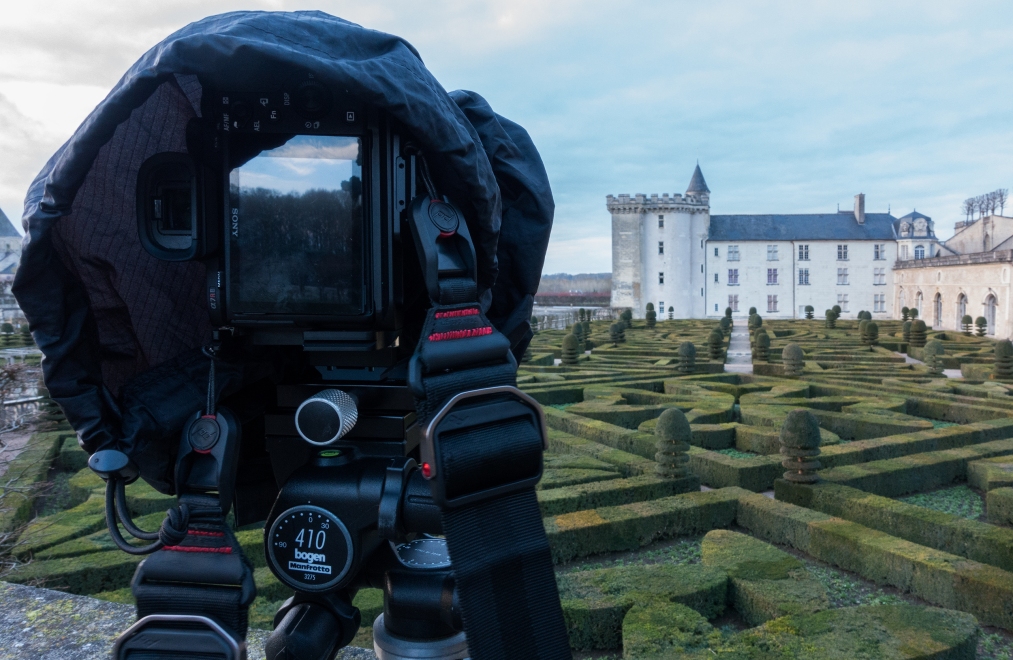

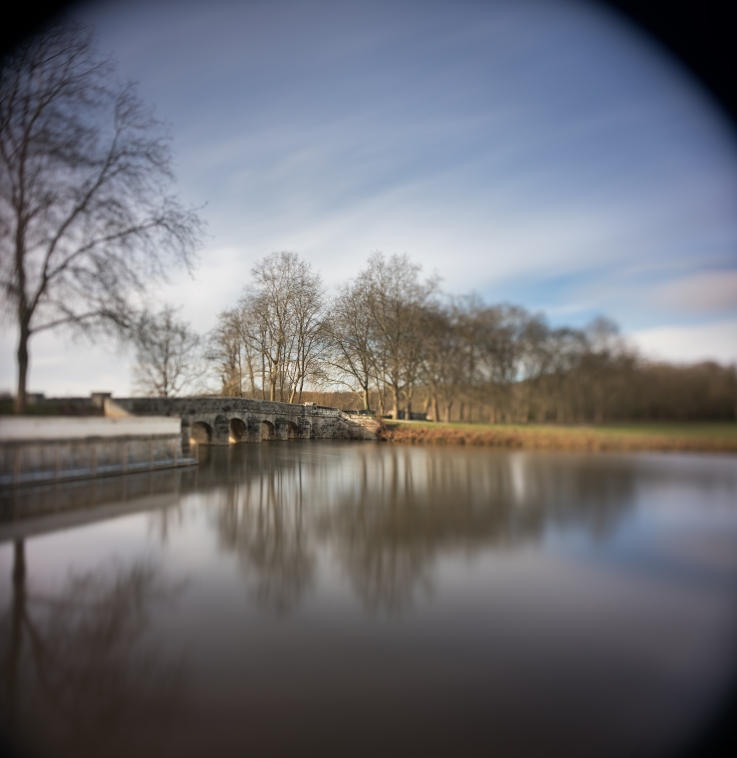
Shooting ~3 minutes long exposure with the Zeiss Otus 55mm f/1.4 @f5.6, together with tilt and shift at Villandry, one of the nicest castles of the Loire Valley, famous internationally for its French-style gardens.
2. Otus 28mm f/1.4:
 Shooting in the rain at the Luxembourg Gardens in Paris. Handheld, maximum tilt to the right, @f8.
Shooting in the rain at the Luxembourg Gardens in Paris. Handheld, maximum diagonal tilt, @f8.

The Tuileries Garden in Paris. Handheld, maximum tilt down, @f2.8.
Zoom of the previous image.
The Tuileries Garden in Paris. Handheld, maximum tilt down, @f5.6.
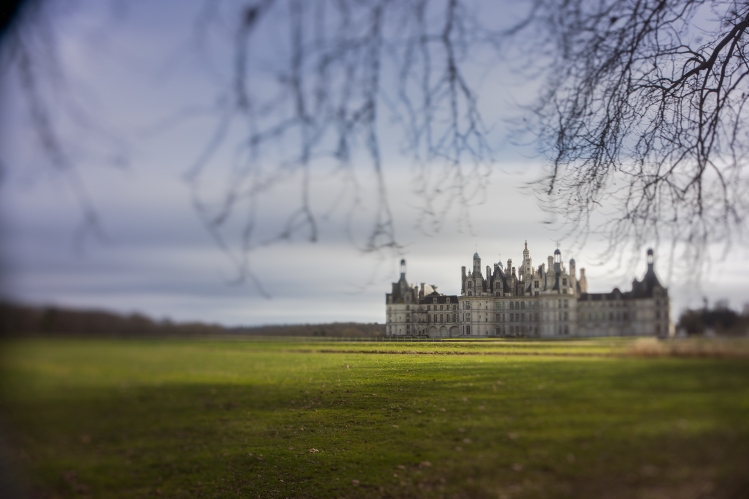
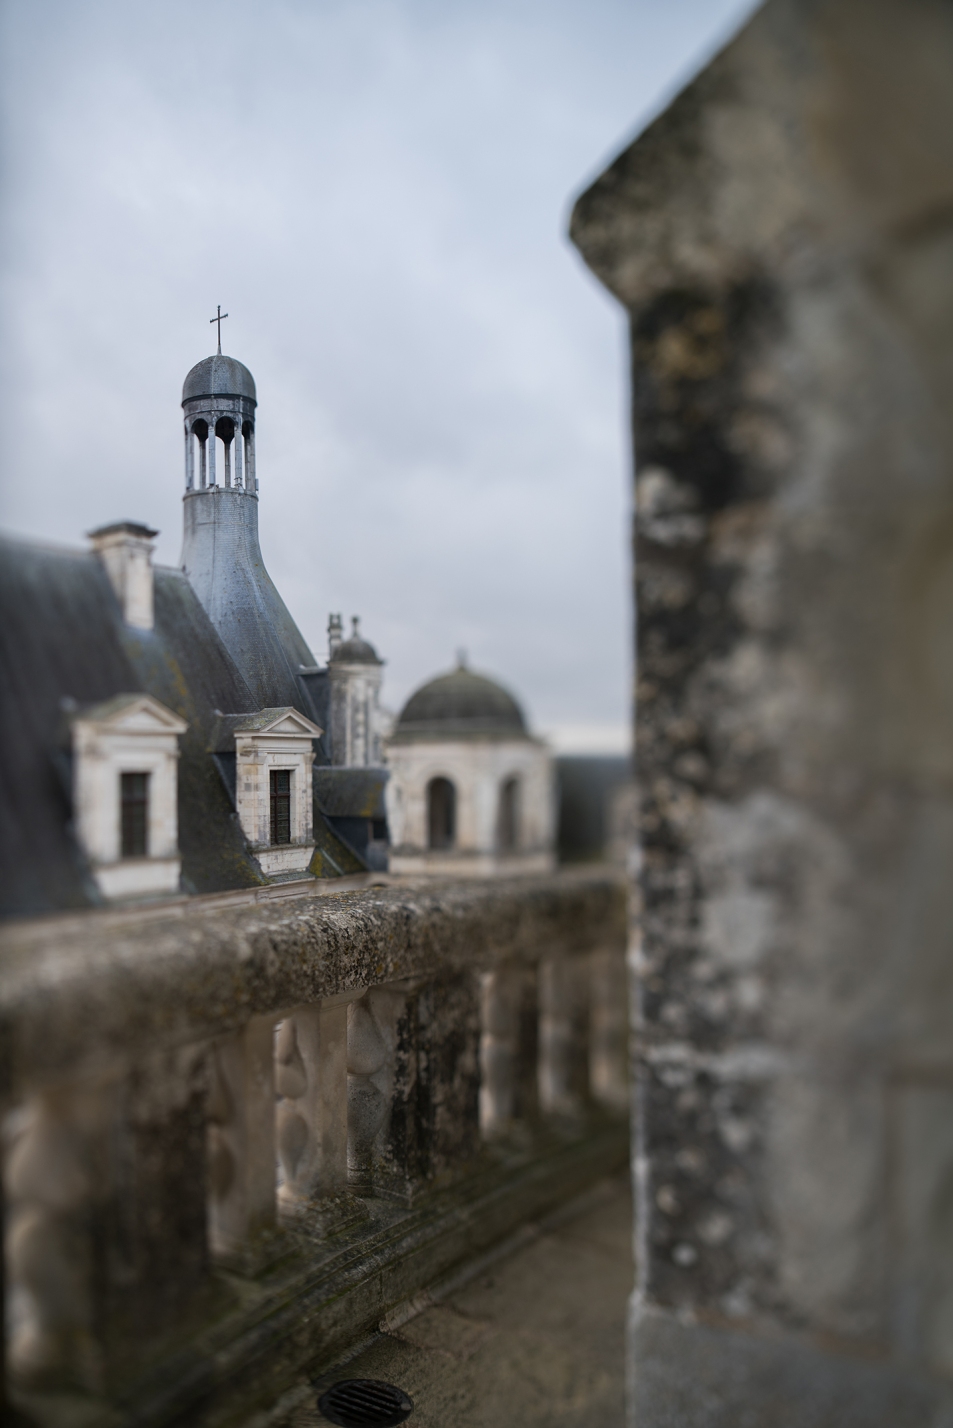
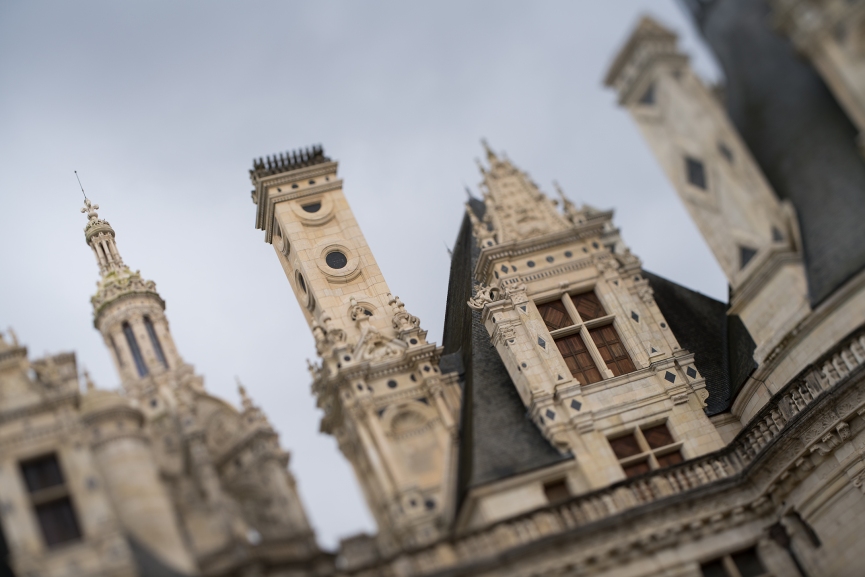
Chambord. On a tripod, maximum diagonal tilt @f5.6 and ~5mm vertical shift (camera lower than lens). Slight vignetting in the upper left corner.
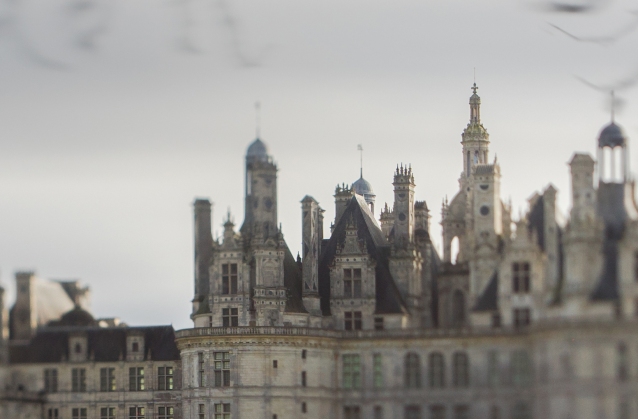
Zoom of the previous image. Maximum sharpness is clearly located on top of the highest tower.
Chambord. On a tripod, 6 images stitched (3 horizontally, over an approximate 10mm distance total; 2 vertically shifted positions accounting for about 5mm), no tilt @f2.8. Slight vignetting in the upper left and right corners.
Chambord. On a tripod, 6 images stitched (3 horizontally, over an approximate 10mm distance total; 2 vertically shifted positions accounting for about 5mm), no tilt @f8. Each image is a ~5 minutes long exposure. No more vignetting is visible.
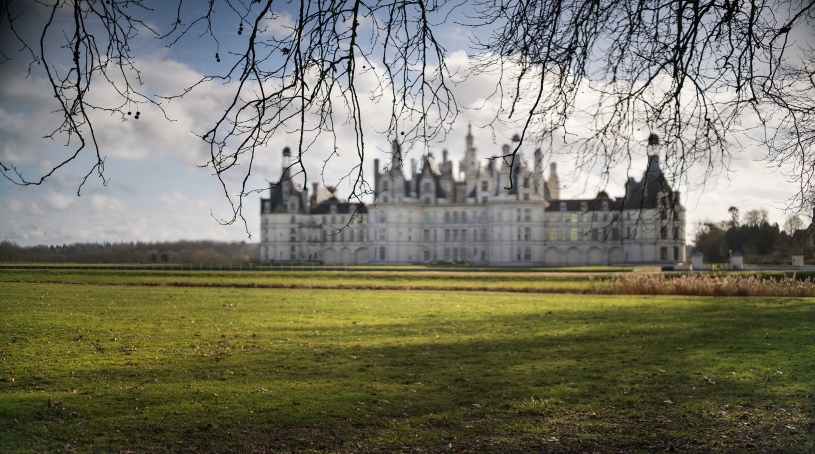
Chambord. Handheld, maximum tilt to the right @f4.
Chambord. Handheld, maximum tilt to the right @f4.

Chenonceau. On a tripod, maximum tilt and ~5mm shift down (for both) of the camera @f5.6.
A few extra images shot in Boston, MA:

On a tripod, no tilt nor shift @f8.
Zoom of the previous image, top left corner.
Zoom of the previous image, bottom right corner.
On a tripod, maximum tilt down, no shift @f2.8.
Zoom of the previous image.
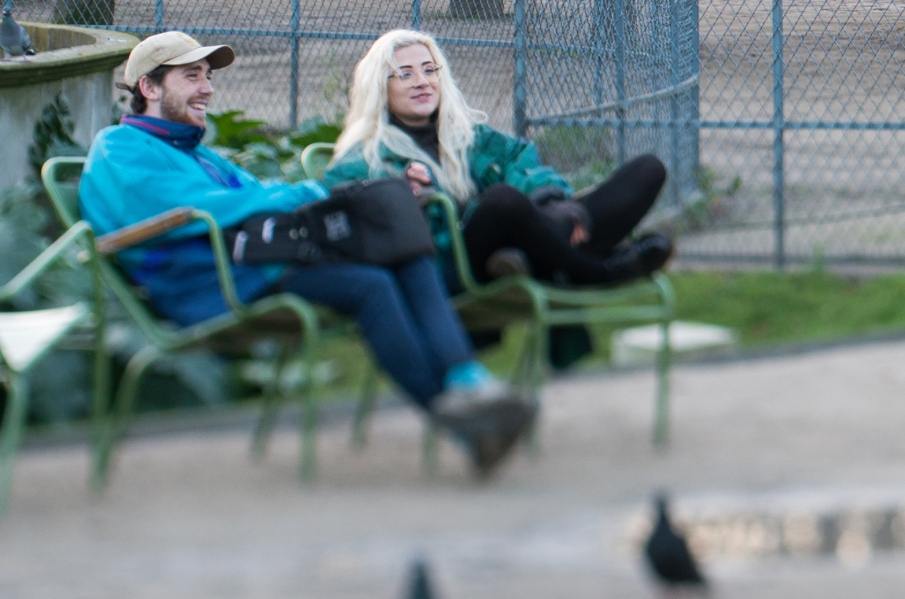
On a tripod, maximum tilt down, no shift @f1.4.

Zoom of the previous image. Please note that at f1.4, only the eyes are sharp, the rest getting blurred as you move away from the focal plane.
On a tripod, maximum tilt down, no shift @f4.
Zoom of the previous image.
2. Otus 55mm f/1.4:
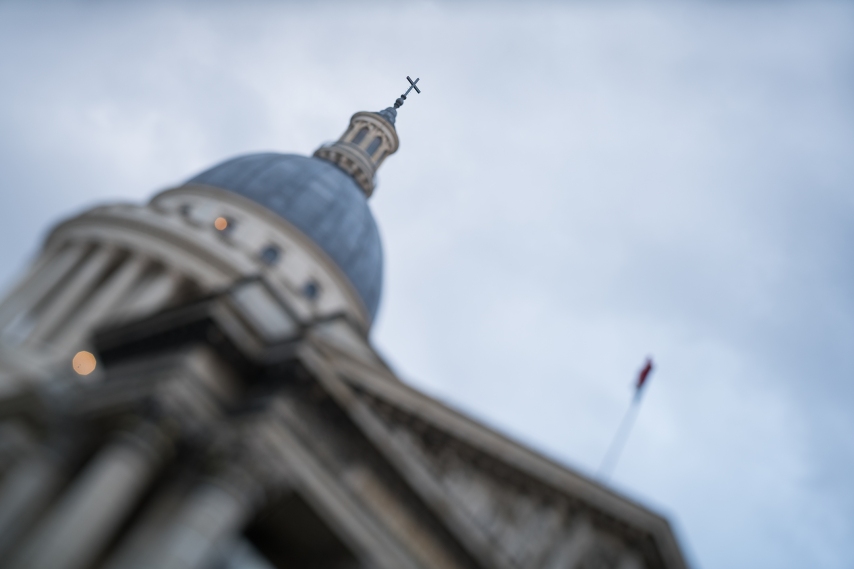
Pantheon, Paris. On a tripod, maximum diagonal tilt @f4. Vignetting is visible but still very manageable.
The Tuileries Garden in Paris. Handheld, maximum diagonal tilt, @f5.6.

The Tuileries Garden in Paris. Handheld, maximum tilt down, @f4.
The Tuileries Garden in Paris. Handheld, maximum diagonal tilt, @f4.
The Tuileries Garden in Paris. Handheld, maximum diagonal tilt, @f4.
The Tuileries Garden in Paris. Handheld, maximum tilt to the right, @f2.8.
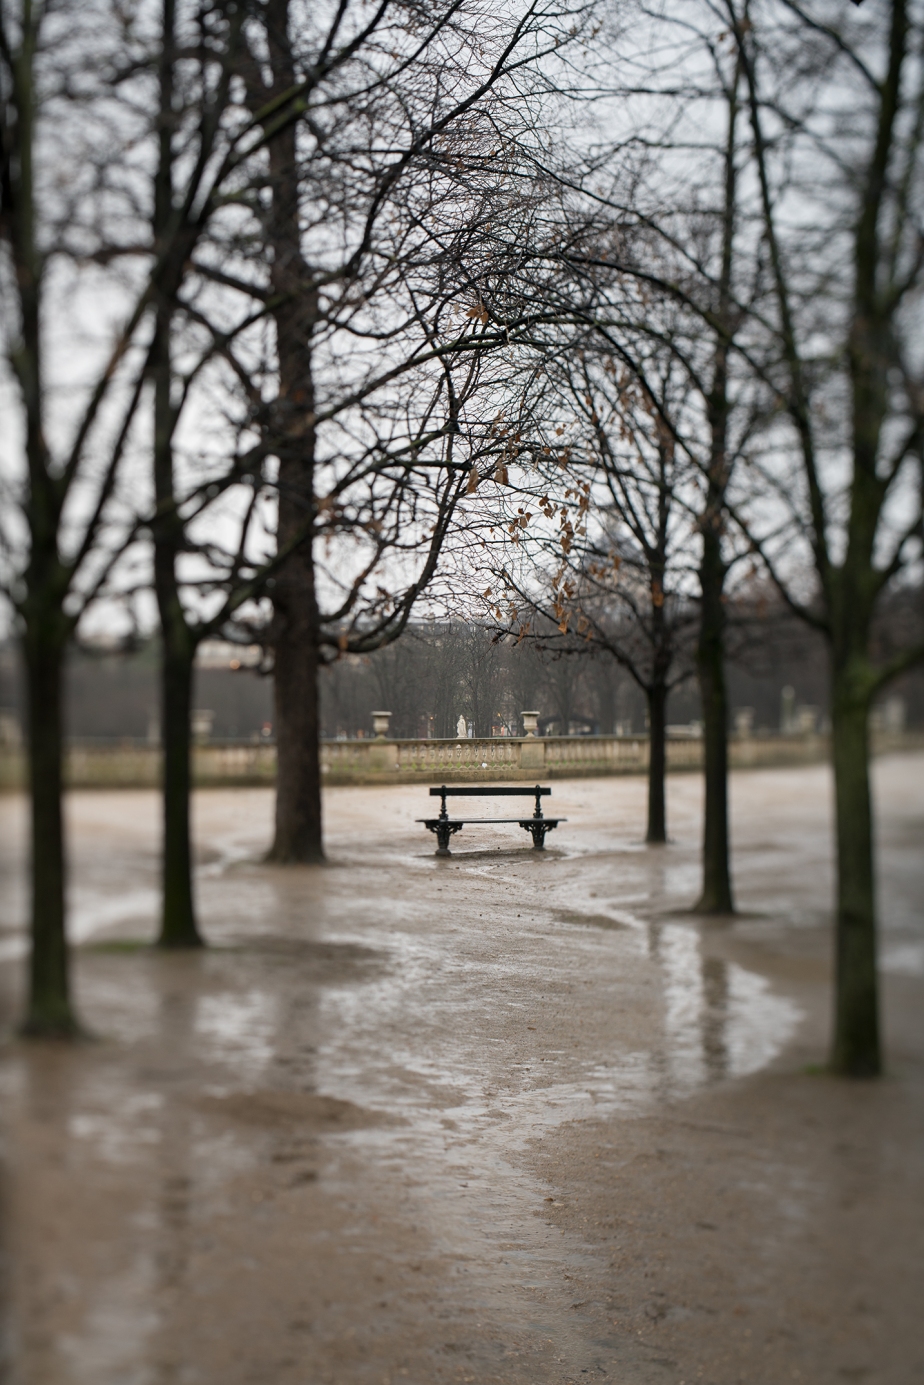
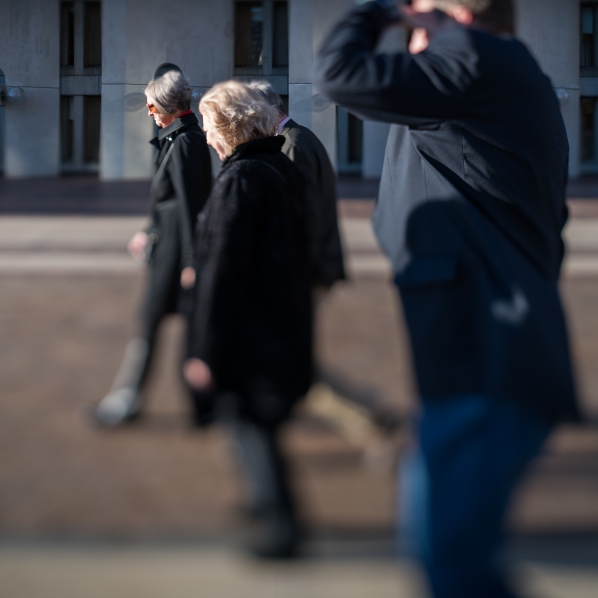
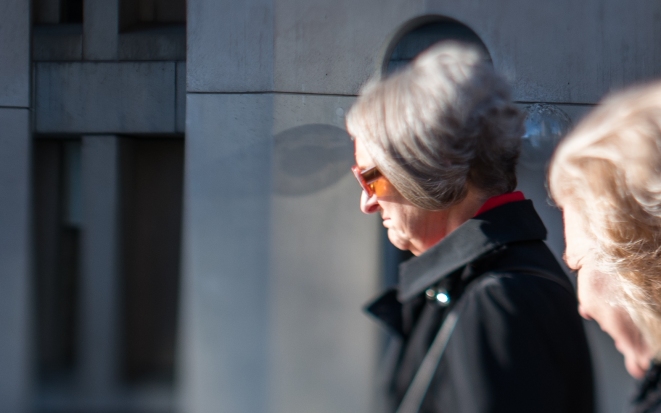
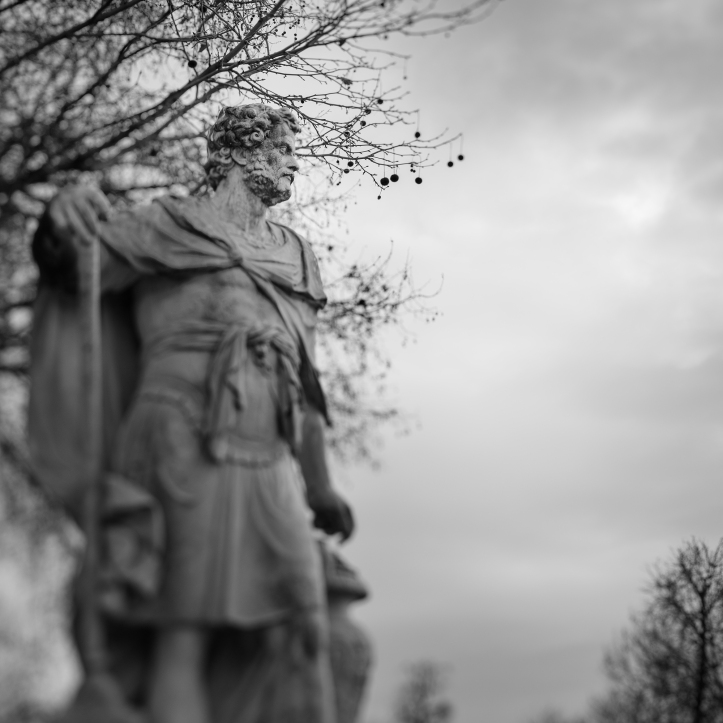
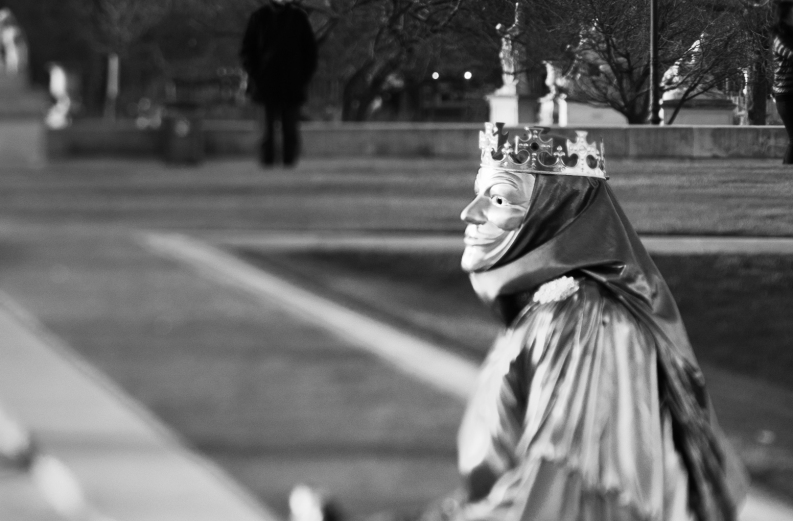
 The Tuileries Garden in Paris. Handheld, maximum diagonal tilt, @f1.4.
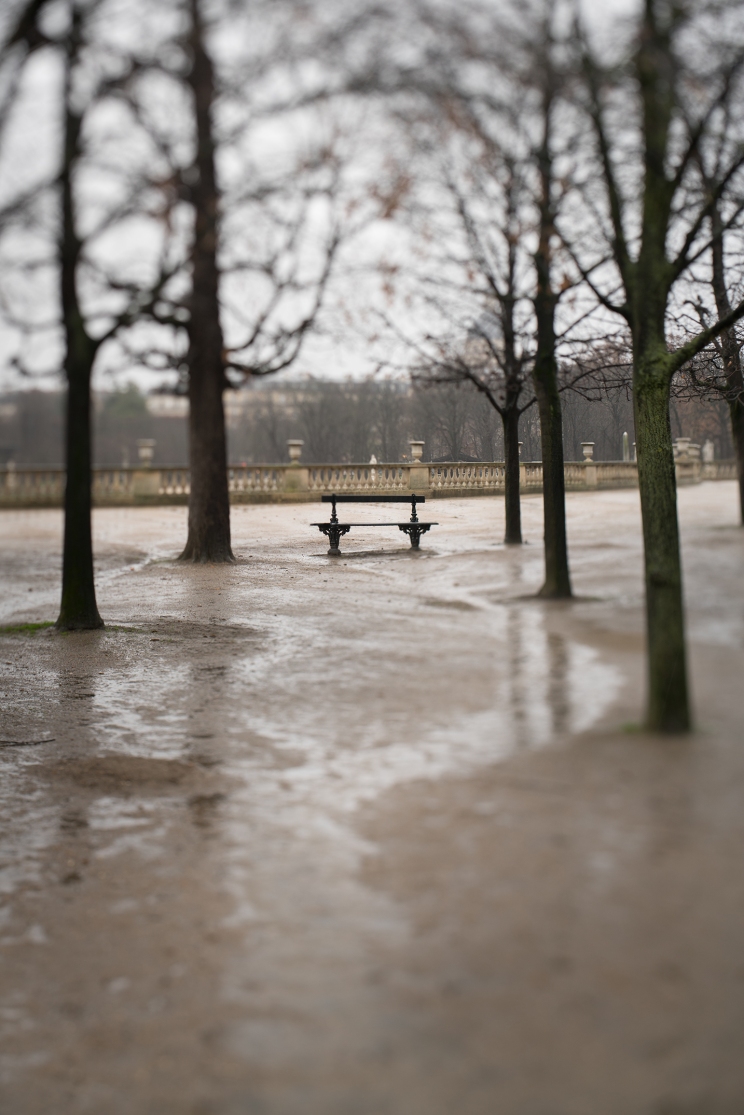
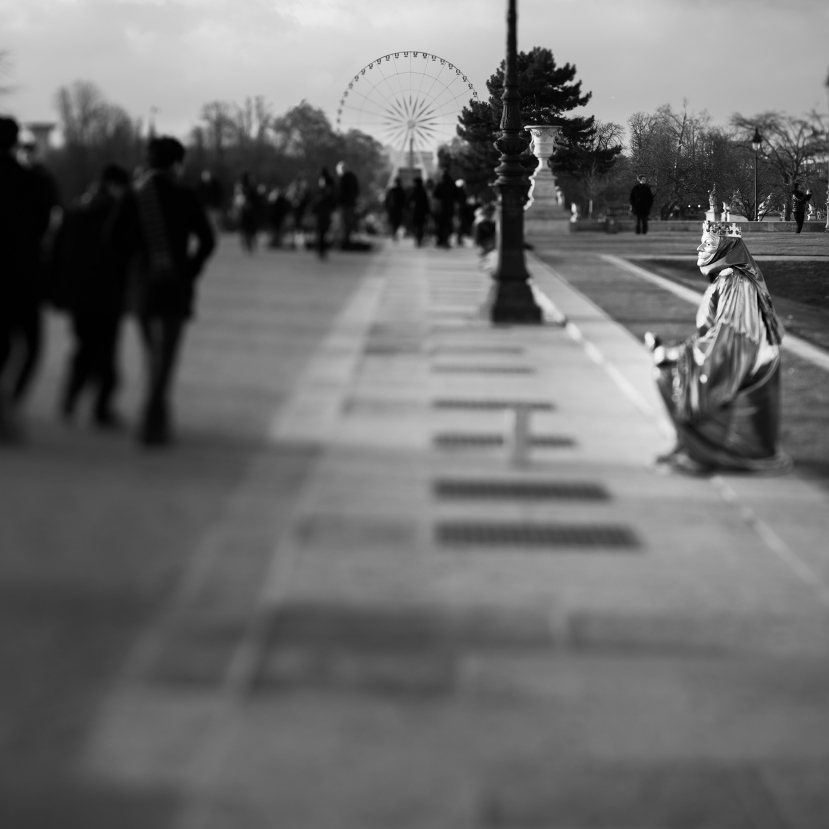
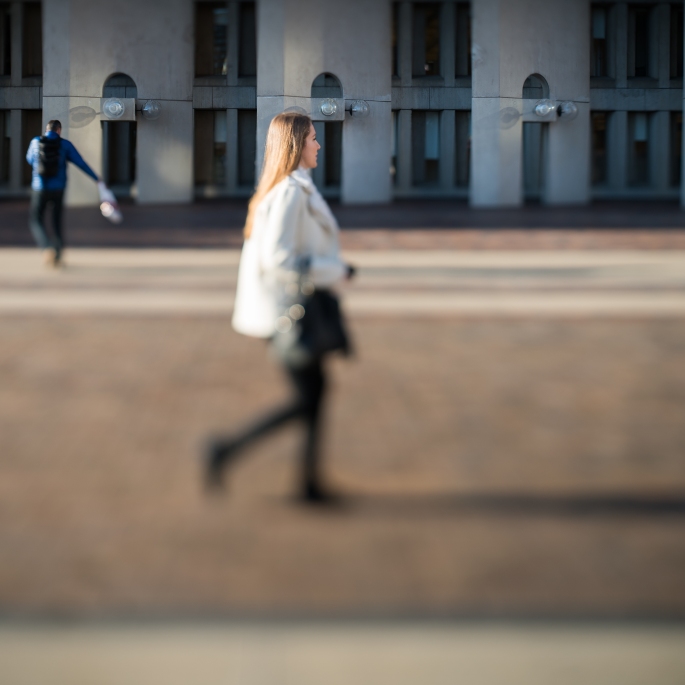
The Tuileries Garden in Paris & Concorde Square in the distance. Handheld, maximum tilt to the right, @f1.4.
Zoom of the previous image.
The Tuileries Garden in Paris & Concorde Square in the distance. Handheld, maximum diagonal tilt, @f4.
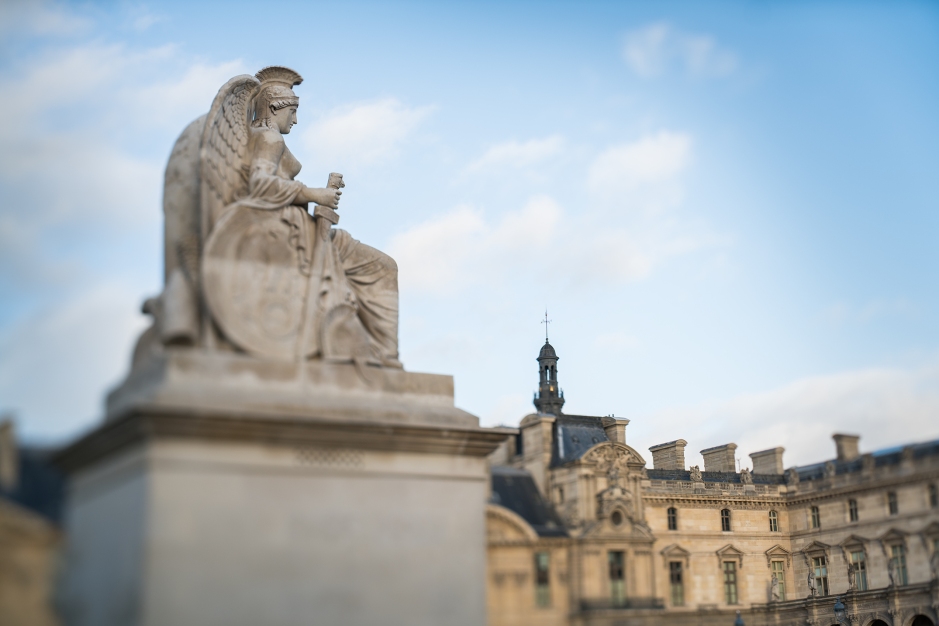
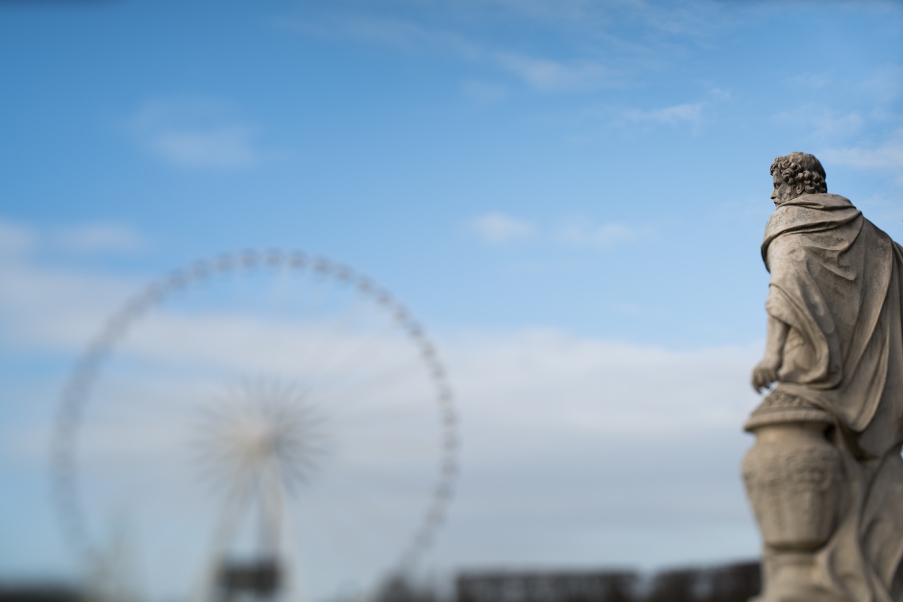
The Louvre Museum in Paris. Handheld, maximum diagonal tilt, @f5.6.
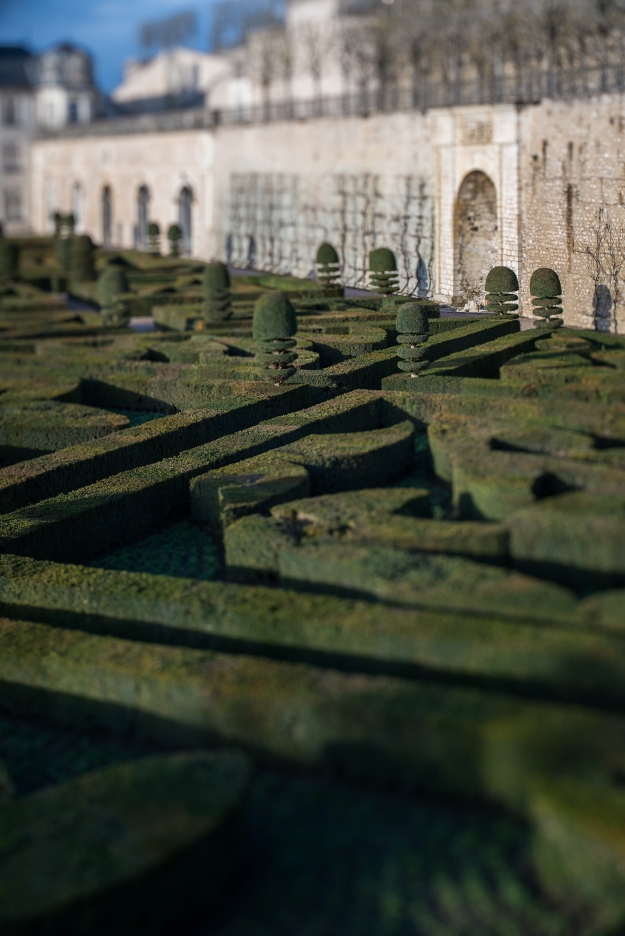
Villandry. On a tripod, maximum diagonal tilt @f5.6.
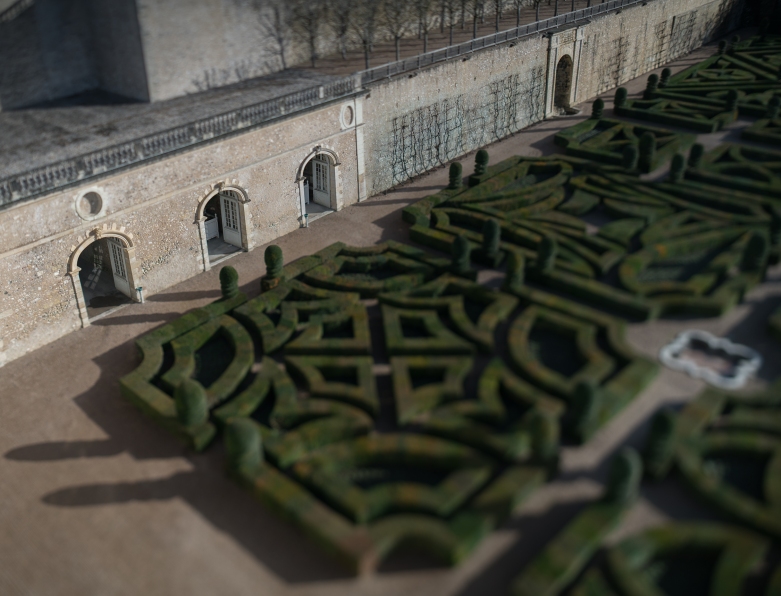
Villandry. Handheld, maximum diagonal tilt @f5.6.
Chambord. On a tripod, maximum tilt to the right @f4. Three images stitched in post, vertically shifted over an entire ~15mm course. Vignetting is clearly visible in the upper left, right and lower right corners.
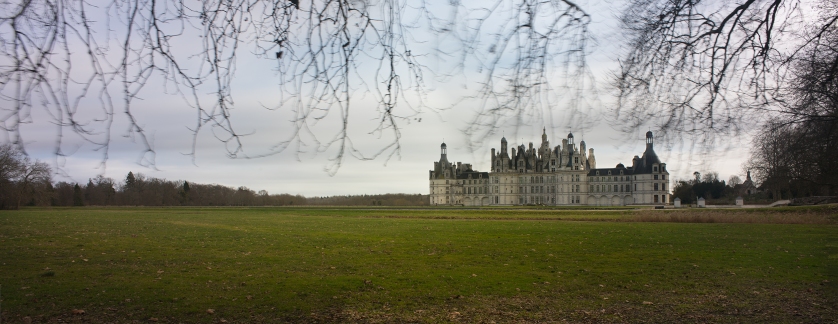
Chambord. Handheld, maximum diagonal tilt @f4.
- Final thoughts:
As you probably have noticed, I’m very excited about this particular setup: either 28 or 55mm Otus lens mounted on the HCam Master TS and a Sony a7RII mirrorless camera. The Otus lenses themselves are AMAZING and top quality, very pleasant to use and optically perfect. The HCam adapter is top notch, strongly built (which is a necessity when dealing with lenses like the Otus), and very precise and easy to adjust. As you have seen, paired together, you will be able to tilt the camera 10° with almost zero vignetting, unless you add a good amount of shift with it (about 5mm each way with the 28mm or 7mm each way with the 55mm). You have probably noticed that it’s also very easy to control the width and position of the focal plane, and that if pushed to the maximum (Master TS tilted at 10° aperture set to f1.4), you can make it extremely shallow!
As a conclusion, the Otus lenses are unique, because of course of their optical quality, but also because their wide image circle make them perfect tools for fine art still photography, and not only for video. They leave you quite a lot of freedom to unleash your artistic vision. Using the ZEISS Otus lenses and the HCam Master TS adapter on my Sony a7RII is the most exciting experience I’ve had with gear and artistically speaking in a very long time.
- Gear:
You can find any of the gear mentioned in this article through the links below:


 Guys!! I have the unique opportunity to ask any questions to some of the top Sony employees who developed the new cameras that got released a couple days ago: the RX10II, the RX100IV, and extremely anticipated a7RII.


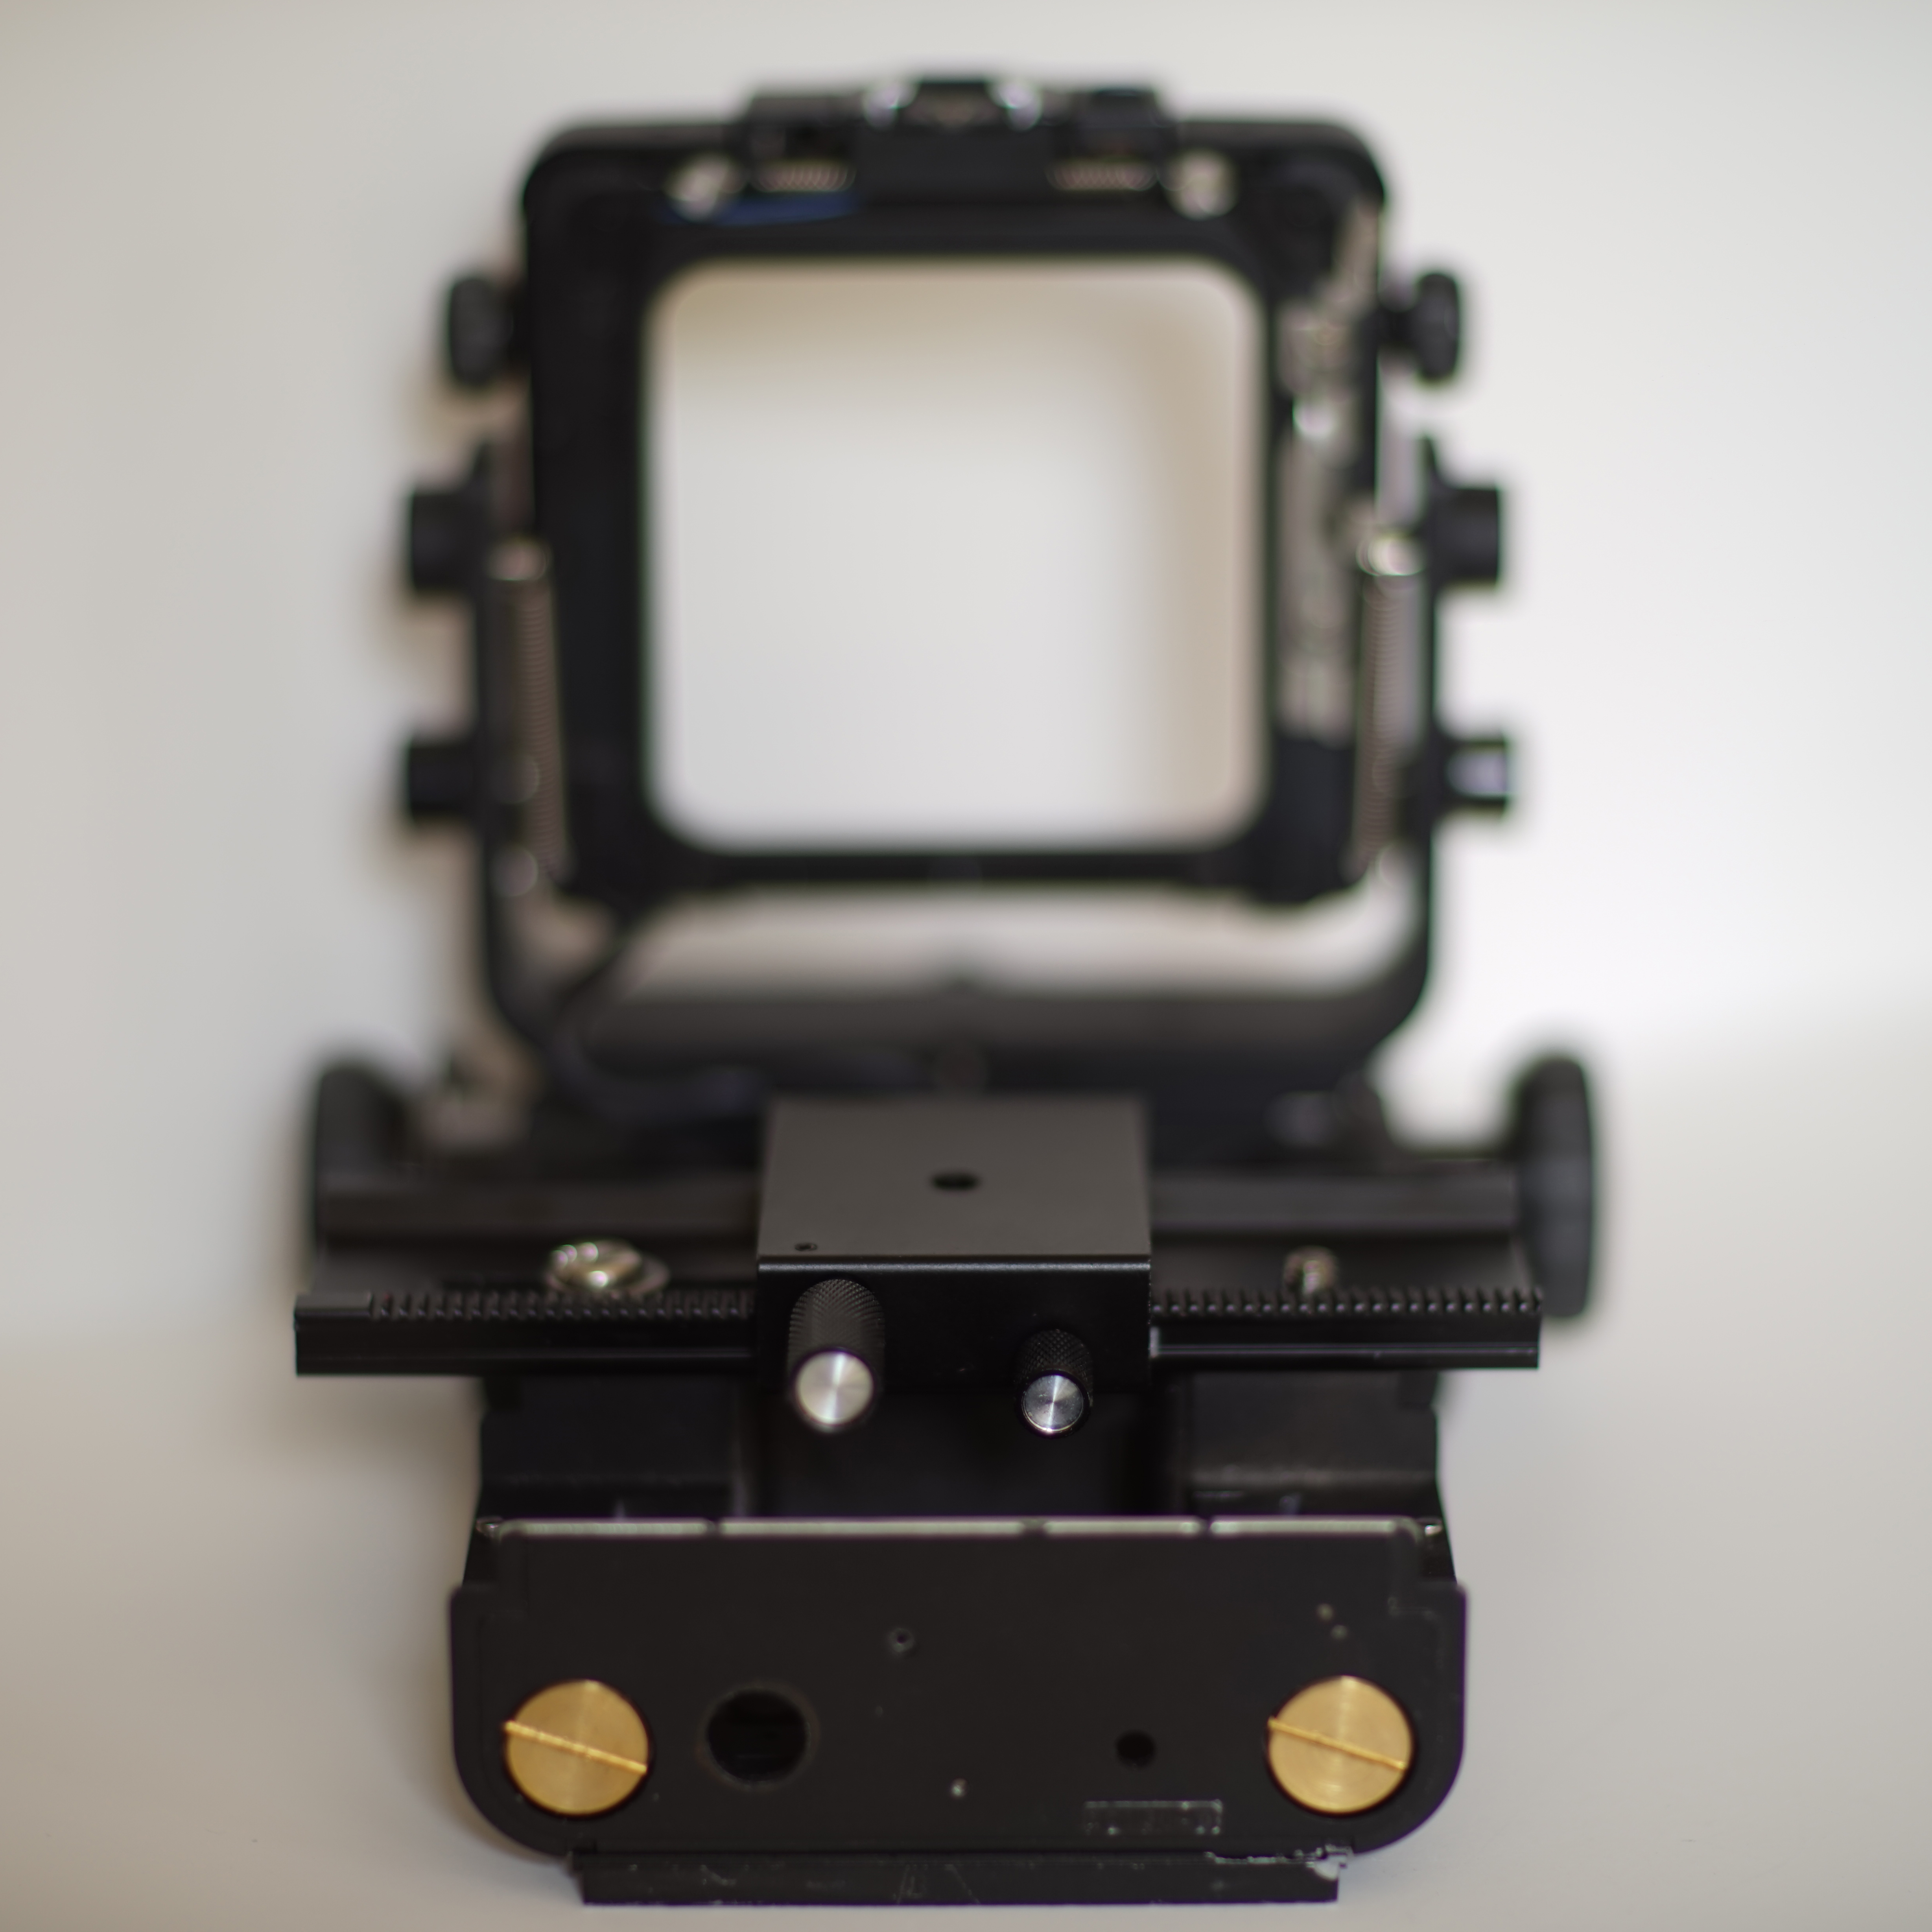


 The idea now is to keep the front
 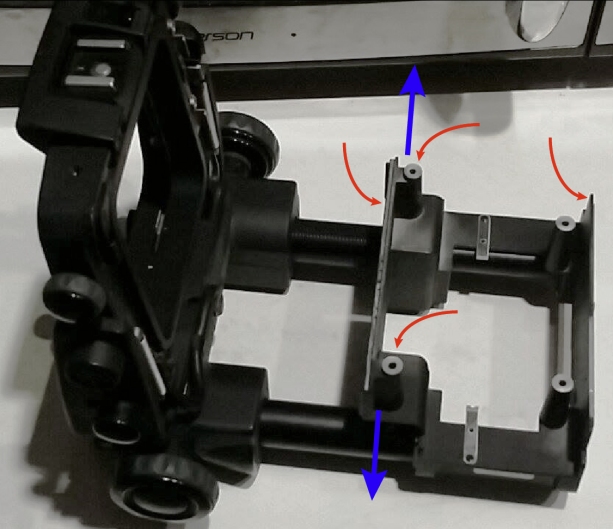 I’m also thinking about adding swing to the back of the camera. The way I see it, it will require a precision rotating stage (similar to what can be found in science labs doing optics), but I’m having issues finding something cheap and precise enough. Ideally, it also has to be about 1 to 2 inches (~25-50mm) in diameter and I would like to have: a knob to rotate the stage, and one to lock in it place. It also needs to handle 3-4 pounds (~2kg) of weight. If you have suggestions, please fire away!
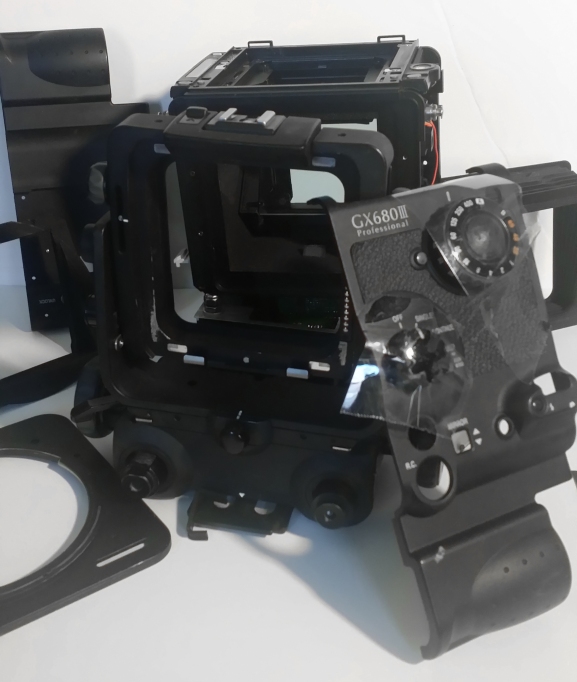
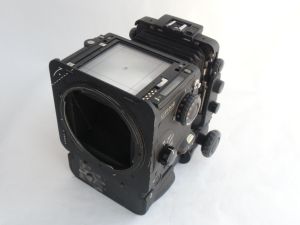
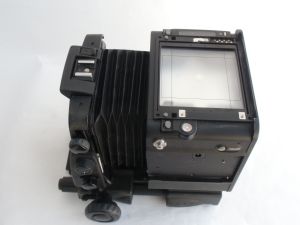
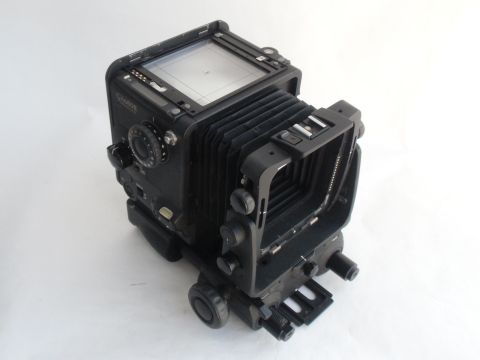 Fuji GX680 III basic body with rear and front elements and bellows. Missing lens, film back and viewfinder.

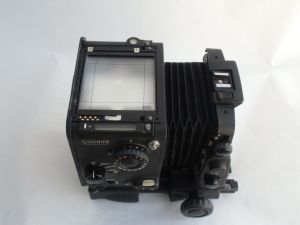
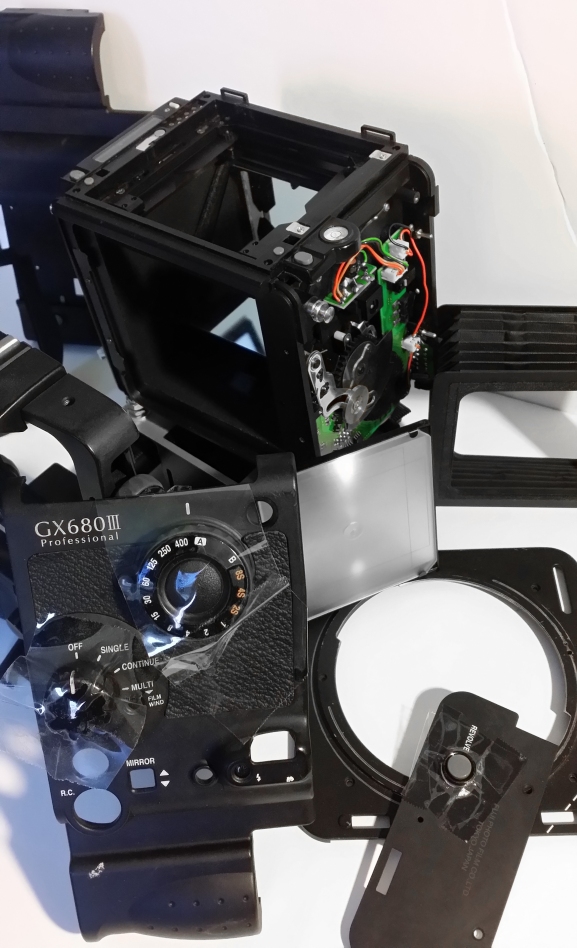
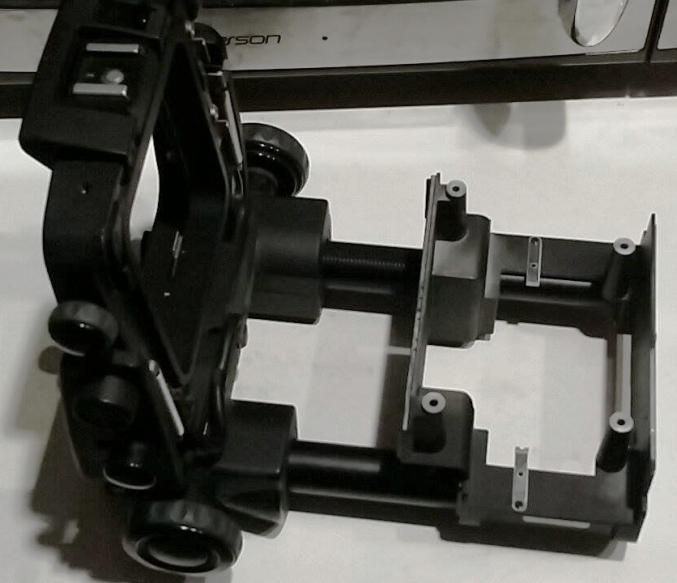
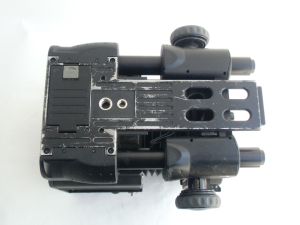 Next steps to come, after I removed all the unnecessary parts! 🙂

